
Elo Network Requirements
The following procedure explains the Network Requirements for EloView. The following IP’s and domains need to be whitelisted to enable full EloView communication from cloud to device.
The client project manager should work with the local network administrator to ensure the Elo network requirements are met.
EloView Domains:
- io.eloview.com
- manage.eloview.com
Armor – Host:
- 74.120.218.143
- 74.120.218.144
Cloudfare – CDN (Content Delivery Network):
- 104.16.170.243
- 104.16.171.243
- 2400:cb00:2048:1:0:0:6810:abf3 (IPv6, if applicable)
- 2400:cb00:2048:1:0:0:6810:aaf3 (IPv6, if applicable)
- Full access to port 443 and the domain “eloview.com” is required for EloView operation.
- EloView uses “2.android.pool.ntp.org” for NTP traffic.
- Our I-Series devices use “WebSocket” to communicate between device and cloud. Initiation is done by device.
Kiosk Initial Hardware Setup
The following information should be provided when the kiosk and pin pad are set up.
Please provide your Tacit Project manager with the following:
- Kiosk serial number for each device (should on home screen when kiosk is turned on)
- Pin pad serial number for each device
- Pin pad model, Store ID and Terminal ID
- Printer model
- Payment information for payment gateway (eg. ES Key for FreedomPay)
IMPORTANT:
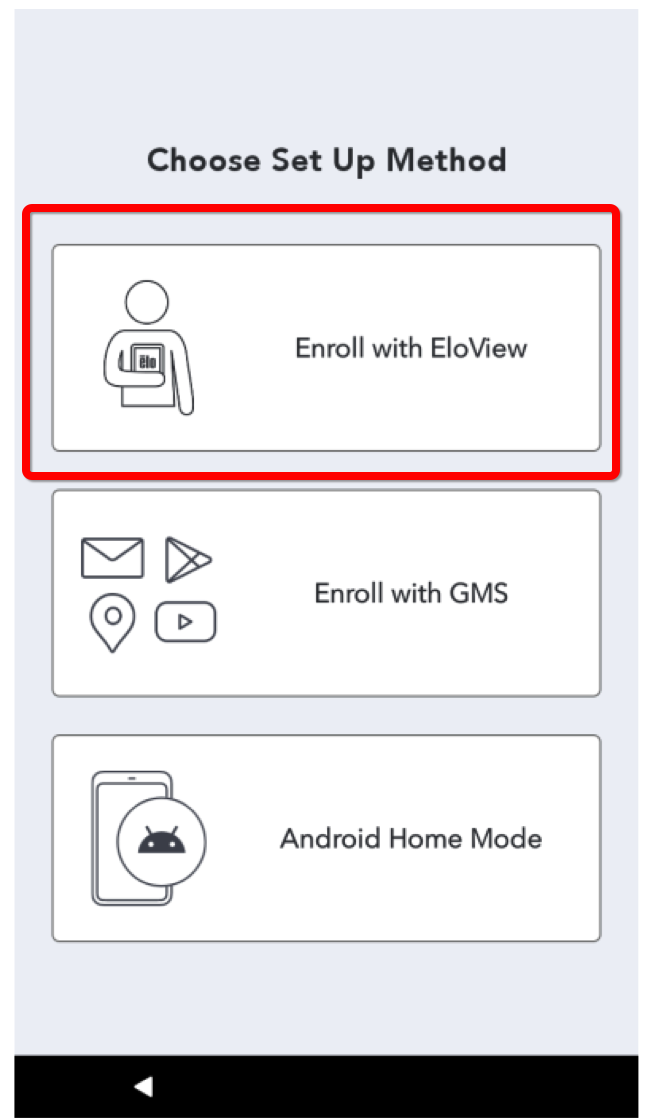
Some devices, such as Kiosk Backpack 4.0, need to be manually enrolled with EloView. When the kiosk is turned on, please select “Enroll with EloView” on the welcome screen.
If for some reason the kiosk is in another mode, you can switch the mode in the settings. Go to Android Settings => System => Advanced => Reset Options. Then select “Erase all data (factory reset to EloView)”. The kiosk will reboot and you will be able to select working mode again.
Steps for connecting to wireless network and getting to home screen
- On the device itself, access the Control Panel by pressing the physical <Home> and <Power> buttons at the same time.
- These buttons are located behind the monitor
- These buttons are located behind the monitor
- When prompted, enter the default password “1elo” (no quotes)
-
- Note: for registered devices, enter the password “tq74tk” (no quotes) or check with your EloView Admin (or the EloView web portal) for the current Control Panel password
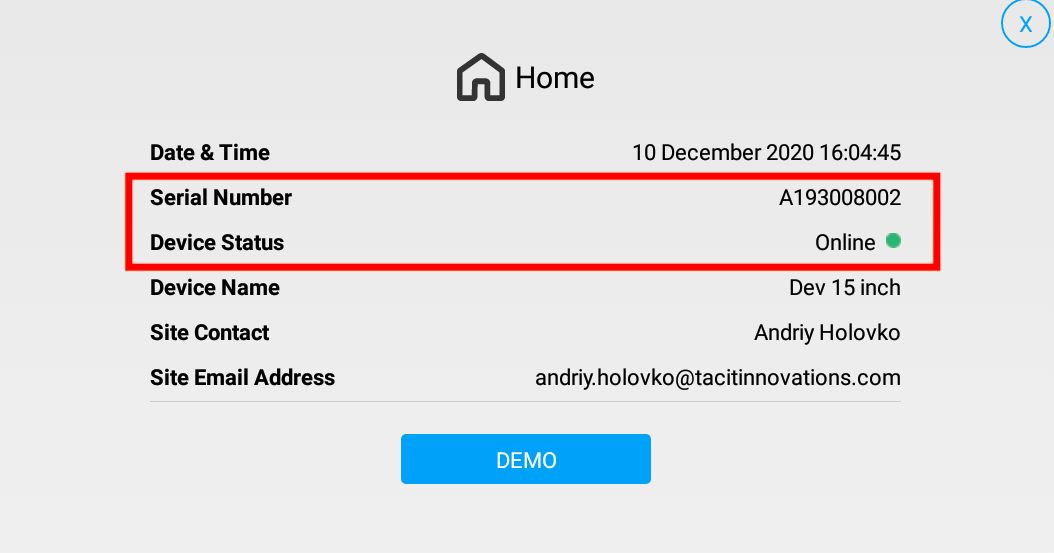
- By default, you are taken directly to the “Home” area
-
- Kiosk Serial number is displayed on the home screen
- Please ensure that the kiosk in Online (Device Status)
Once the information above is provided and the kiosk is online, Tacit can do the remote install. In some cases, however, additional steps will be required from your side to prepare the kiosk to work.
Additional steps on Elo Backpack 4.0 Kiosks
Enroll with EloView
When your kiosk first starts up, please select “Enroll with EloView”.
If for some reason the kiosk is in another mode, you can switch the mode in the settings.
- Go to Android Settings => System => Advanced => Reset Options.
- Select “Erase all data (factory reset to EloView)”.
The kiosk will reboot and you will be able to select working mode again.

Adjust display resolution
Depending on device, you might want to adjust display resolution.
- Press Power and Home buttons at the back of the Elo Backpack device.
- Unlock Elo Control panel
- Open Android Settings
- Go to Display settings
In the Display settings you need to set:
- Display Size: Small
- Density: 160dpi
When changing display settings the kiosk will reboot to apply changes.
IMPORTANT: Password to unlock the Elo control panel “tq74tk” and Android Settings – “1elo”.
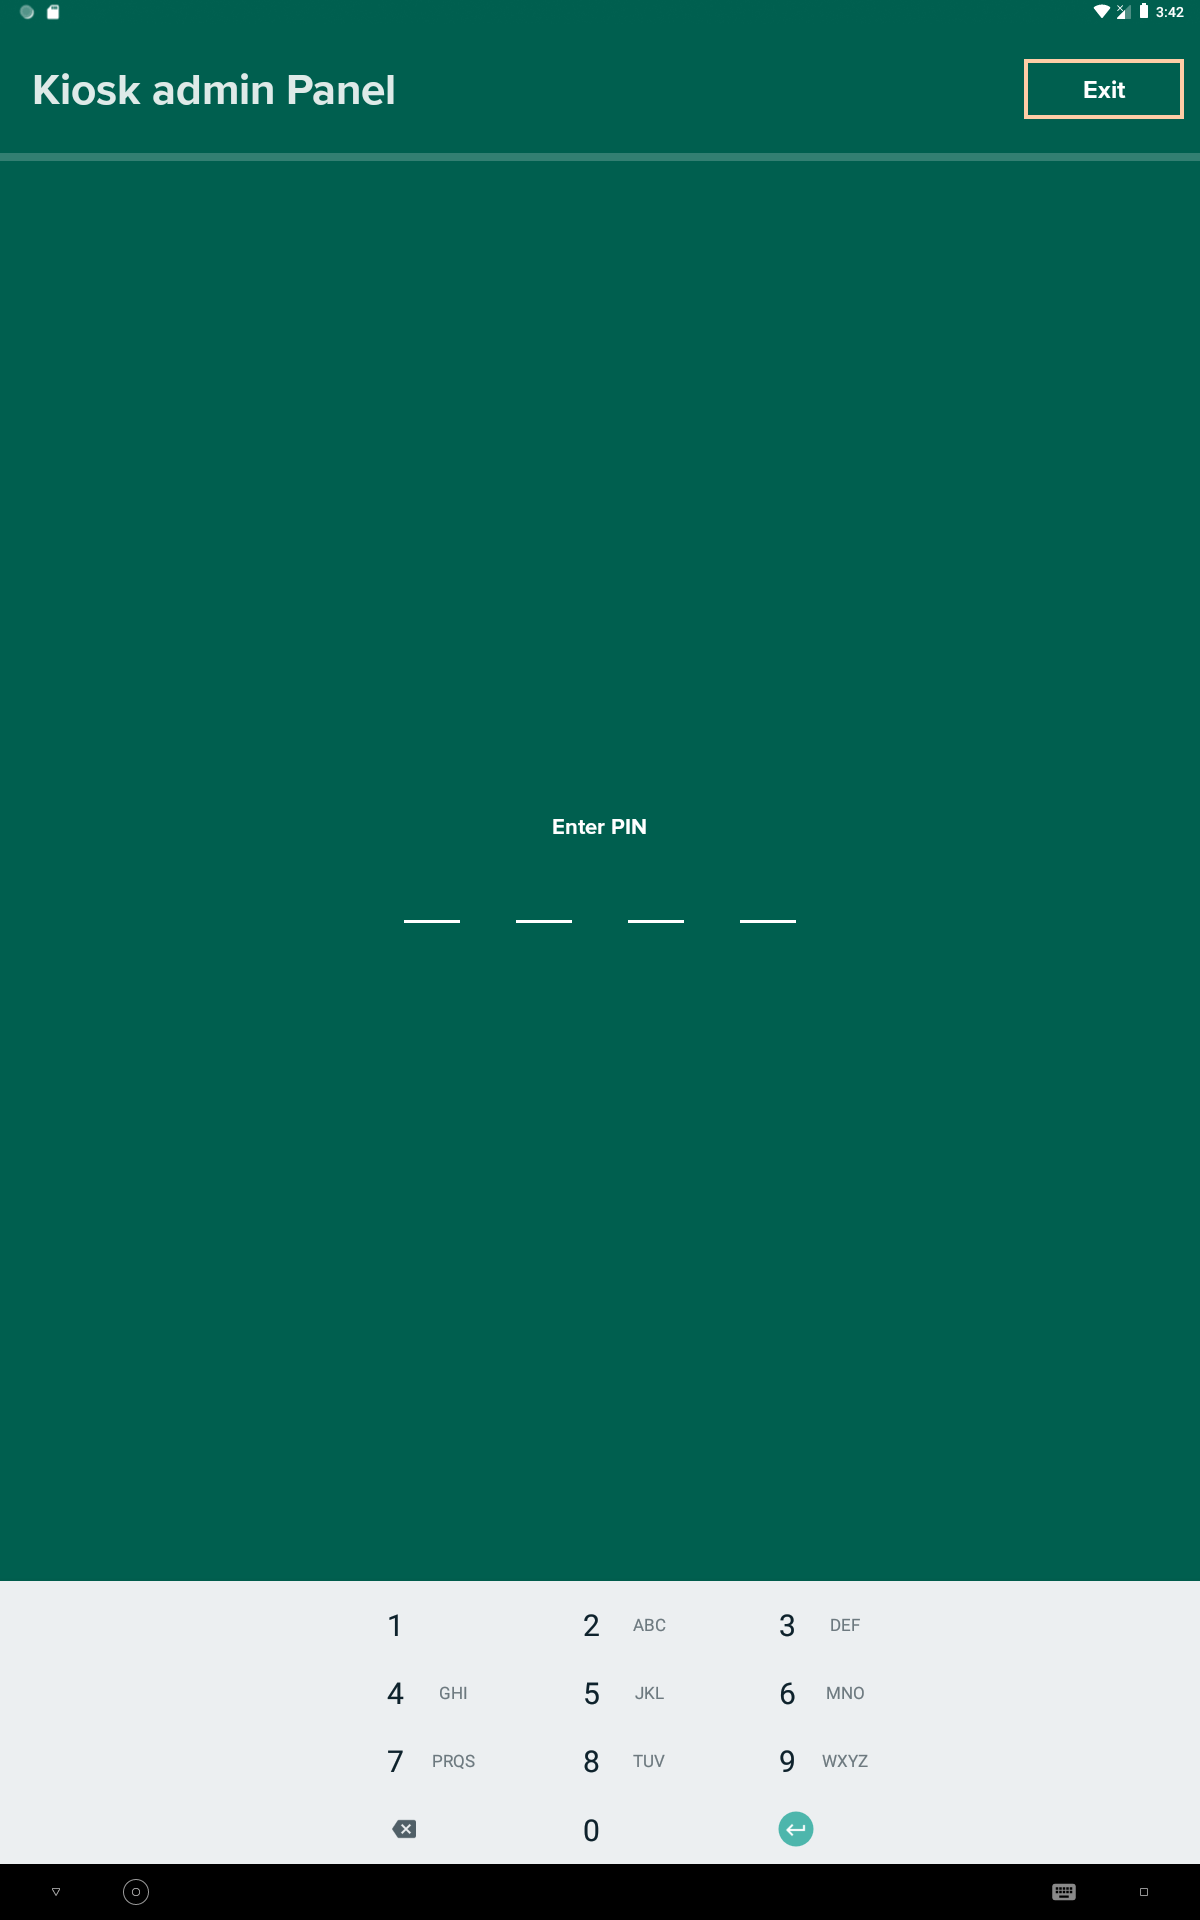
Login to Kiosk Admin Panel
- Tap quickly 5 times on the top left corner of the landing screen.
- Enter PIN “5555”
 .
. 
Printer Setup
To setup the printer for the kiosk, follow the steps below:
- Go to the admin panel (click 5 times on the top left corner and enter pin code = "5555")
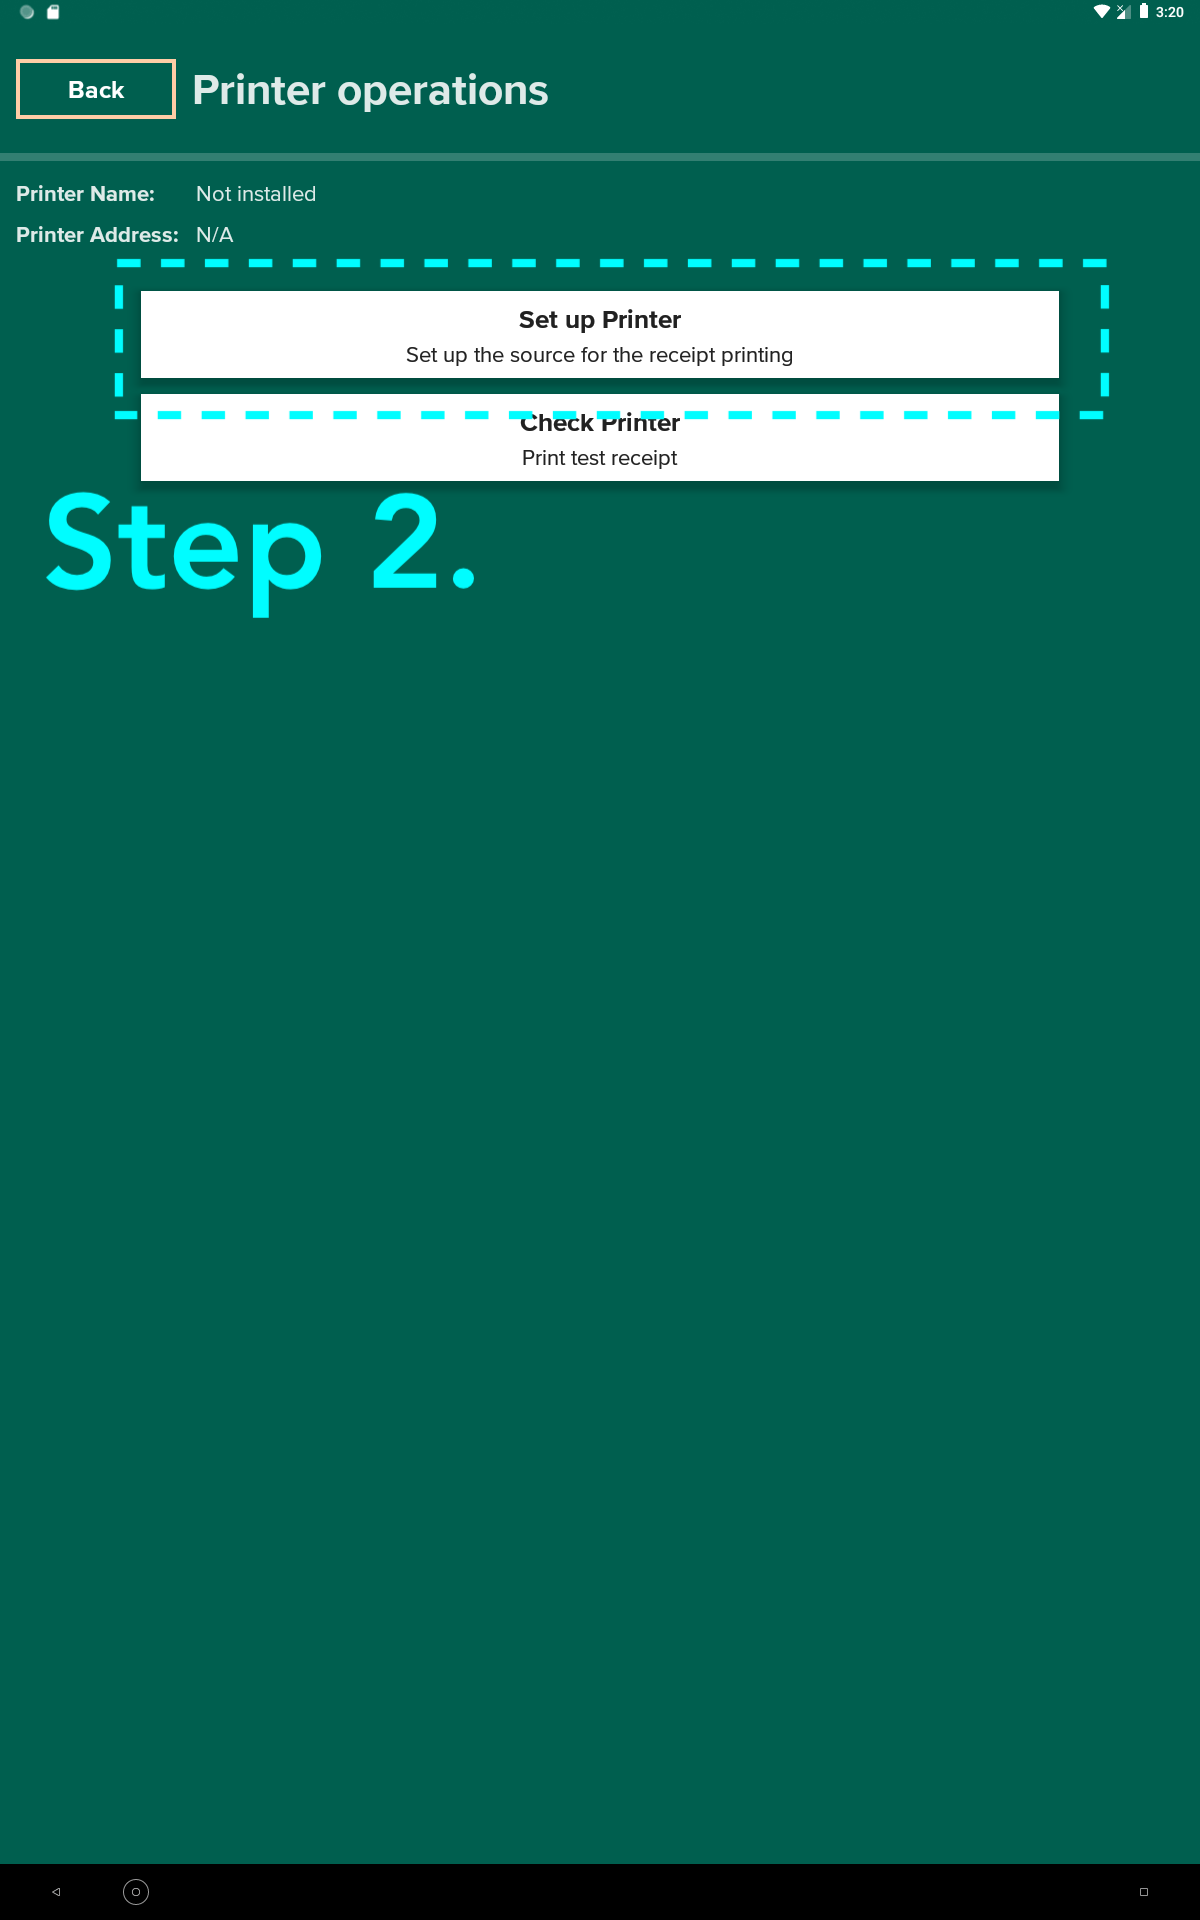
- On the admin panel click the button "Printer Operations"
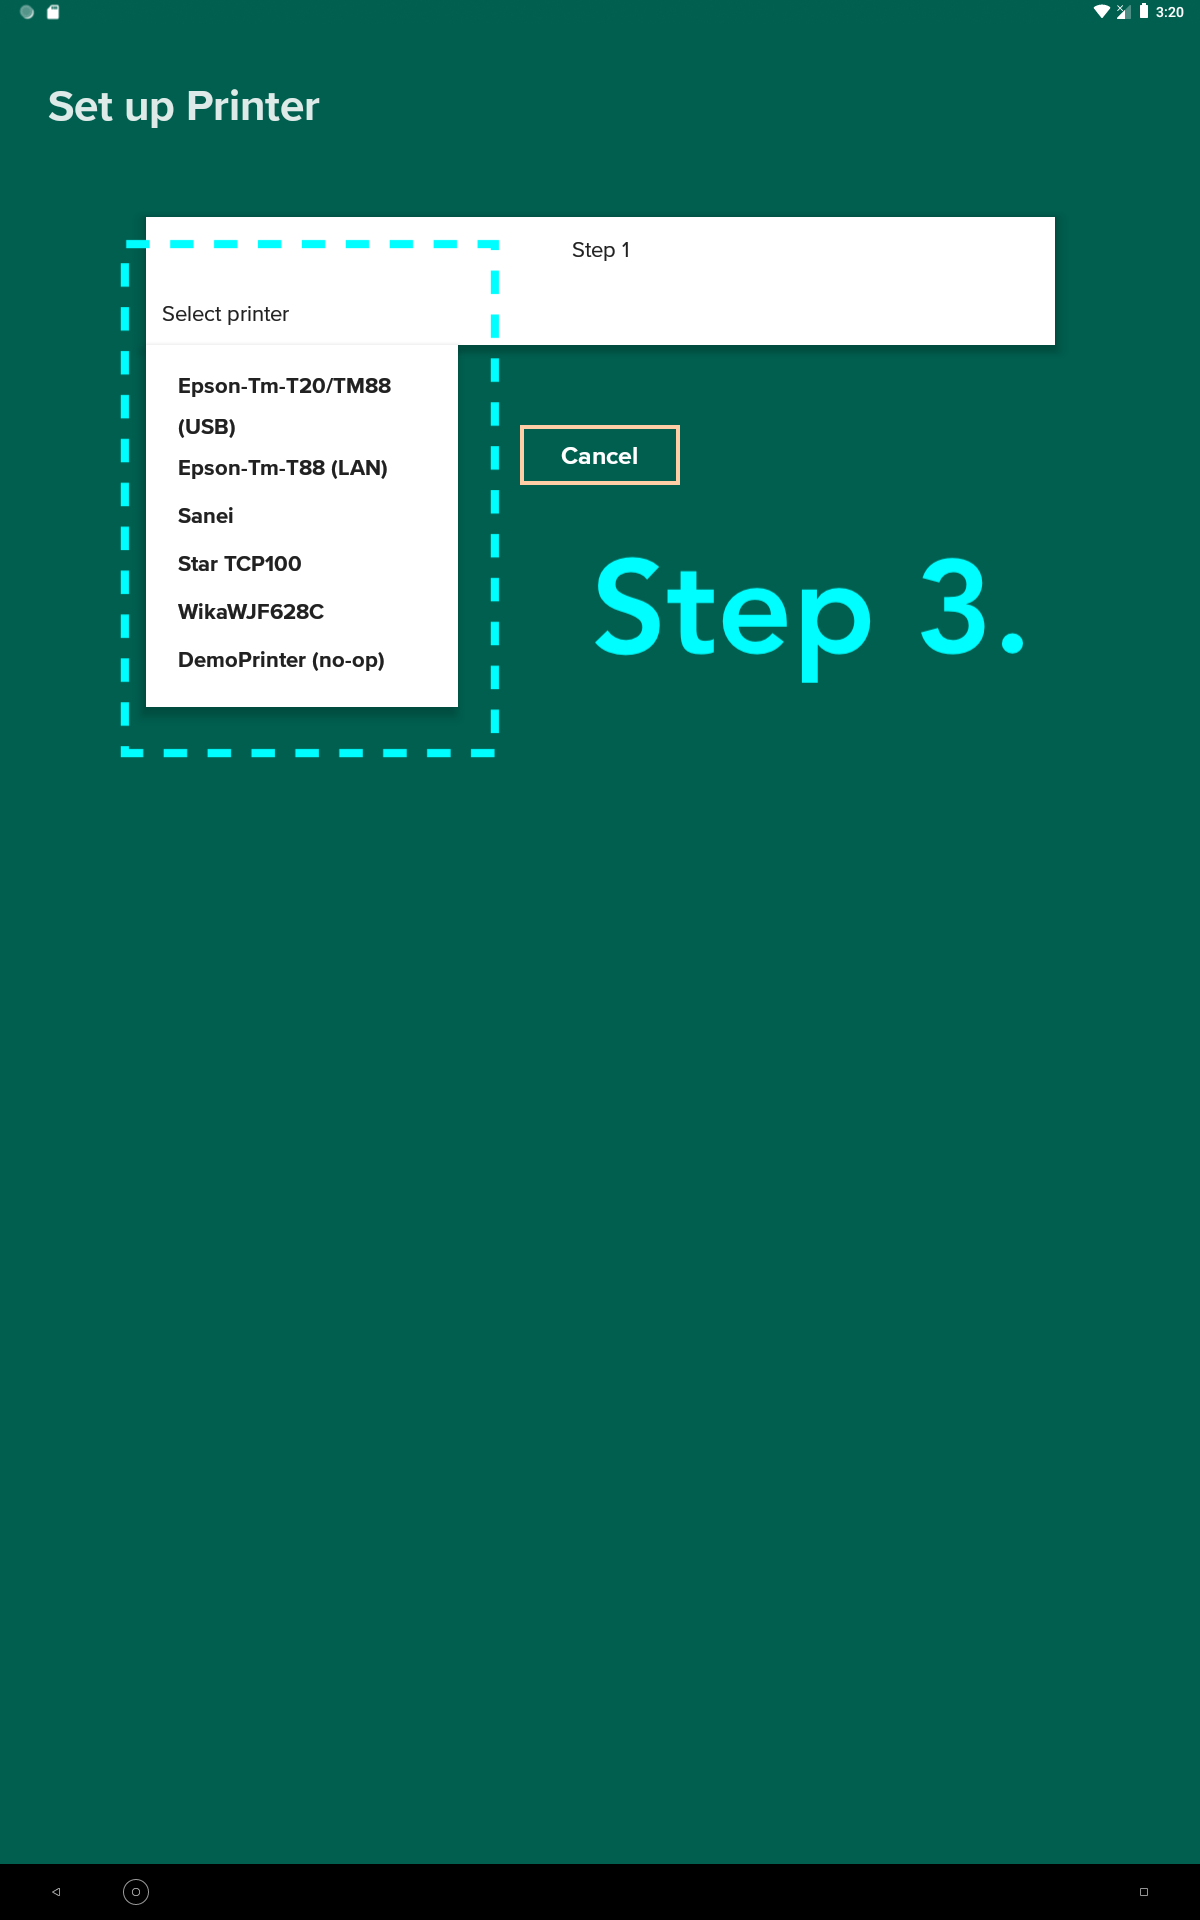
- Click on the “Set up Printer” button
- Choose printer model, e.g. Epson Tm-T20 from the drop down list
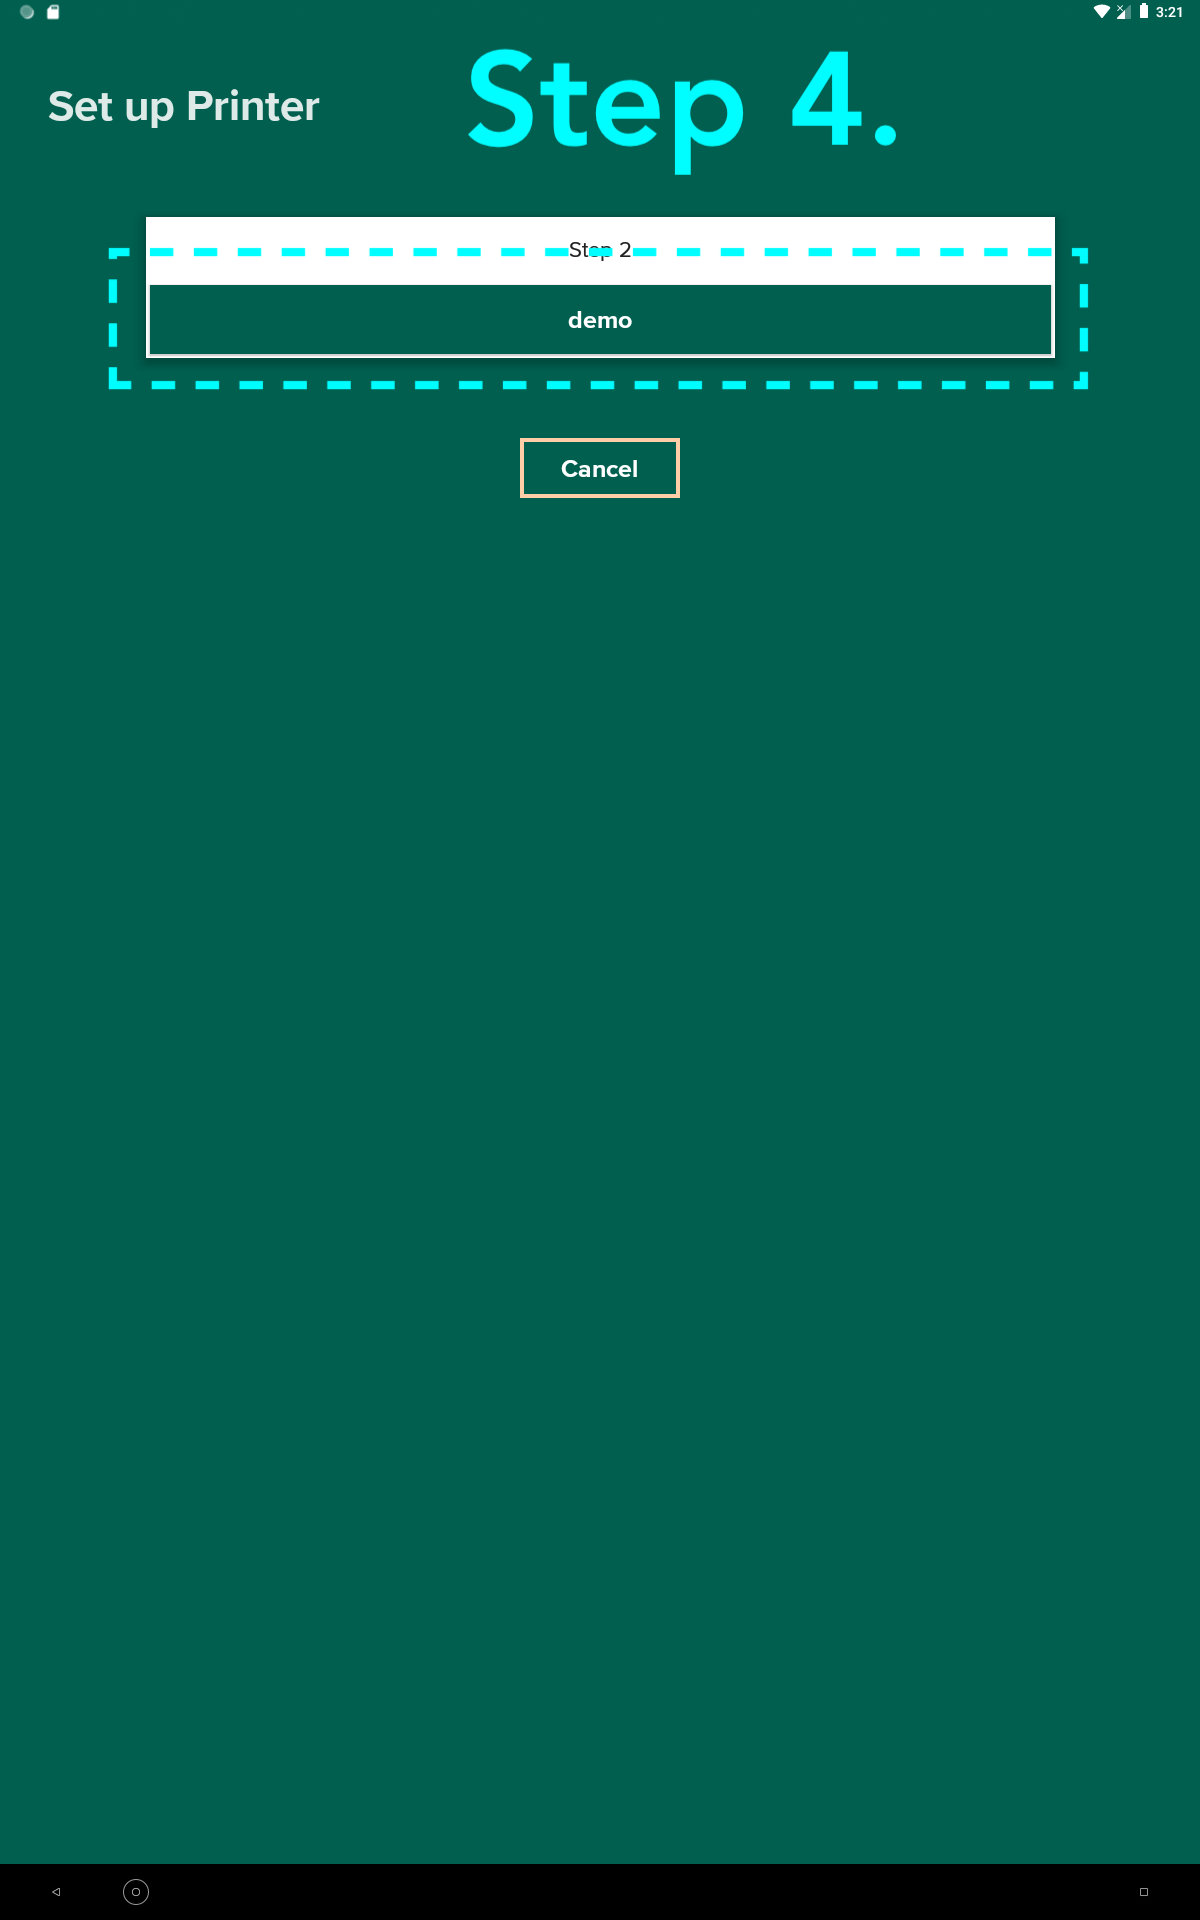
- Select printer from the list that will appear after printer discovery.
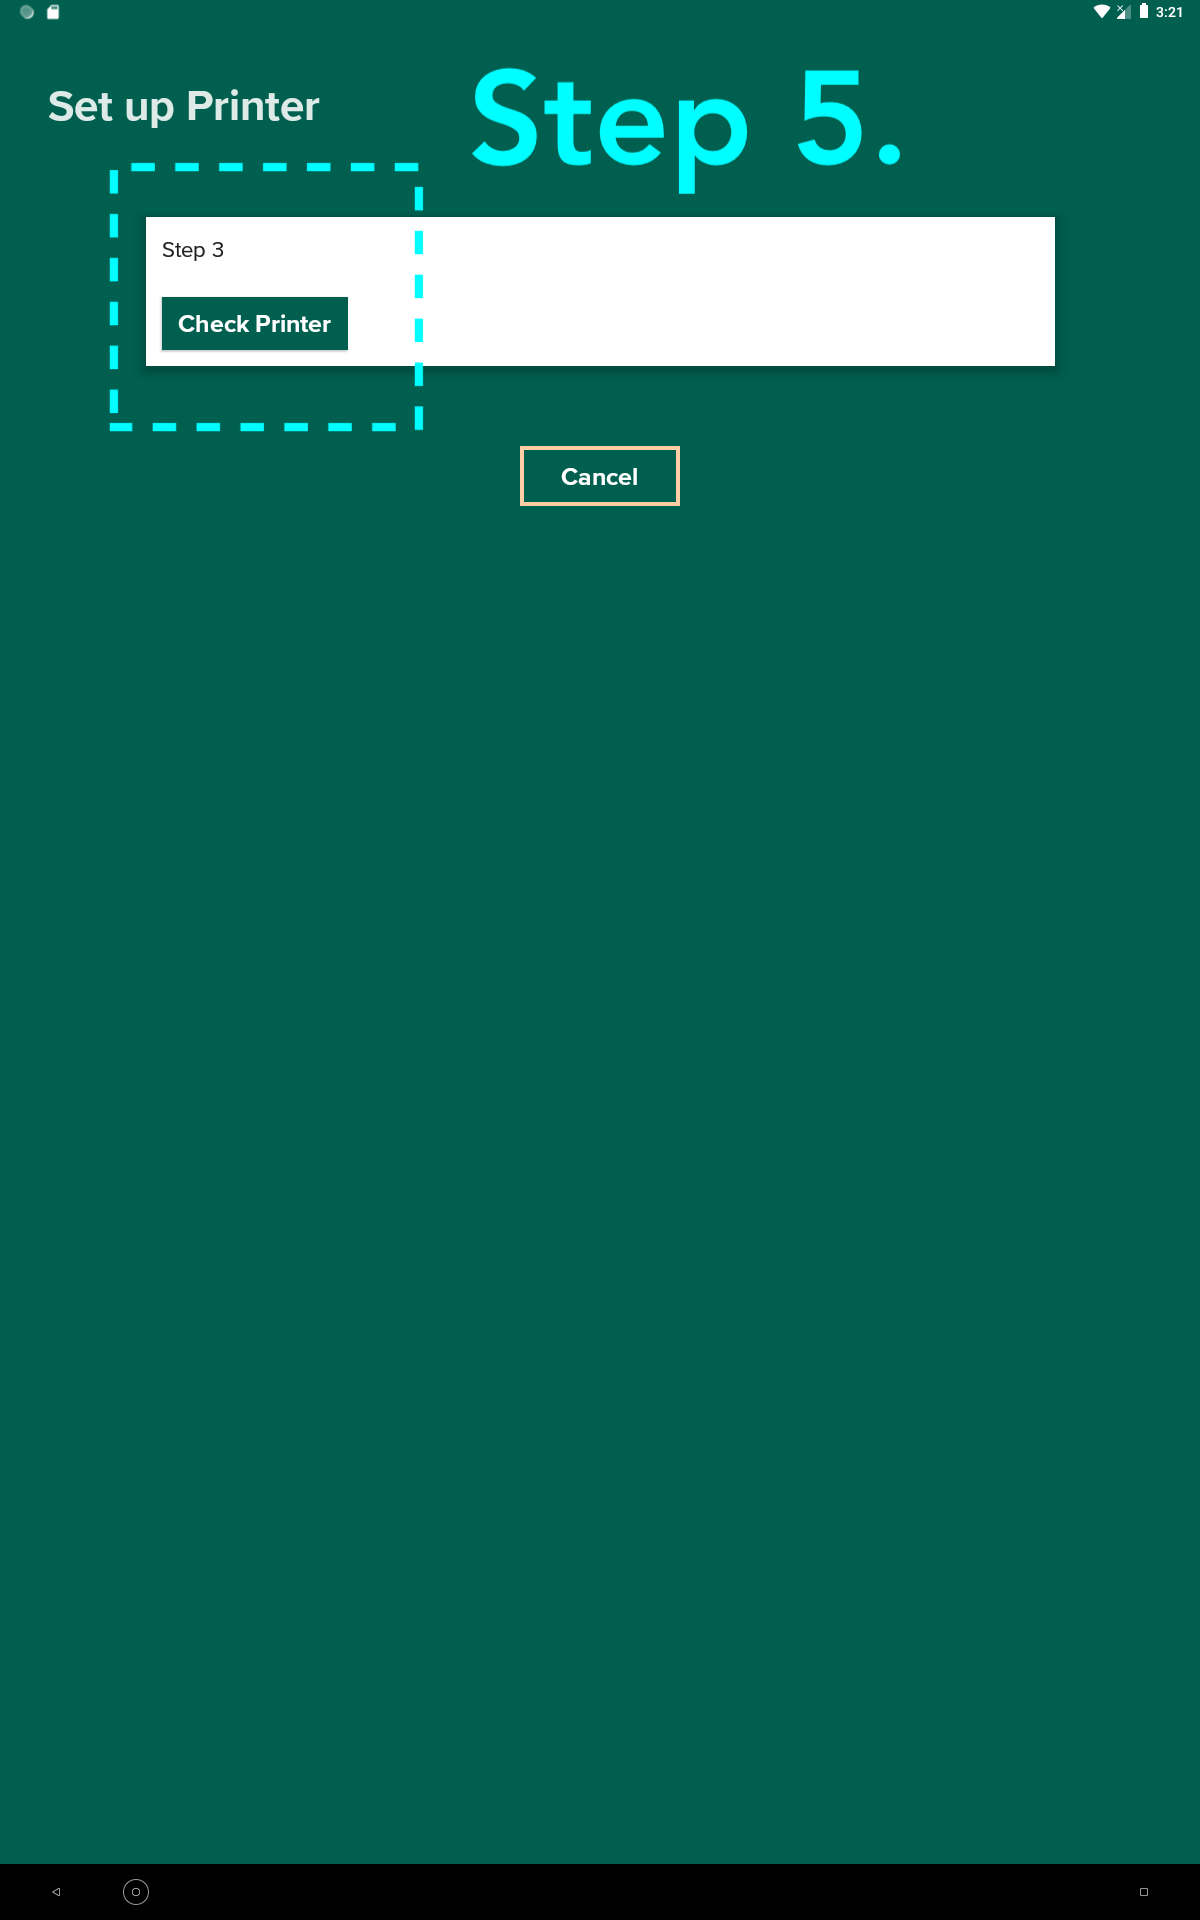
- Click “Check Printer” to print a sample receipt.
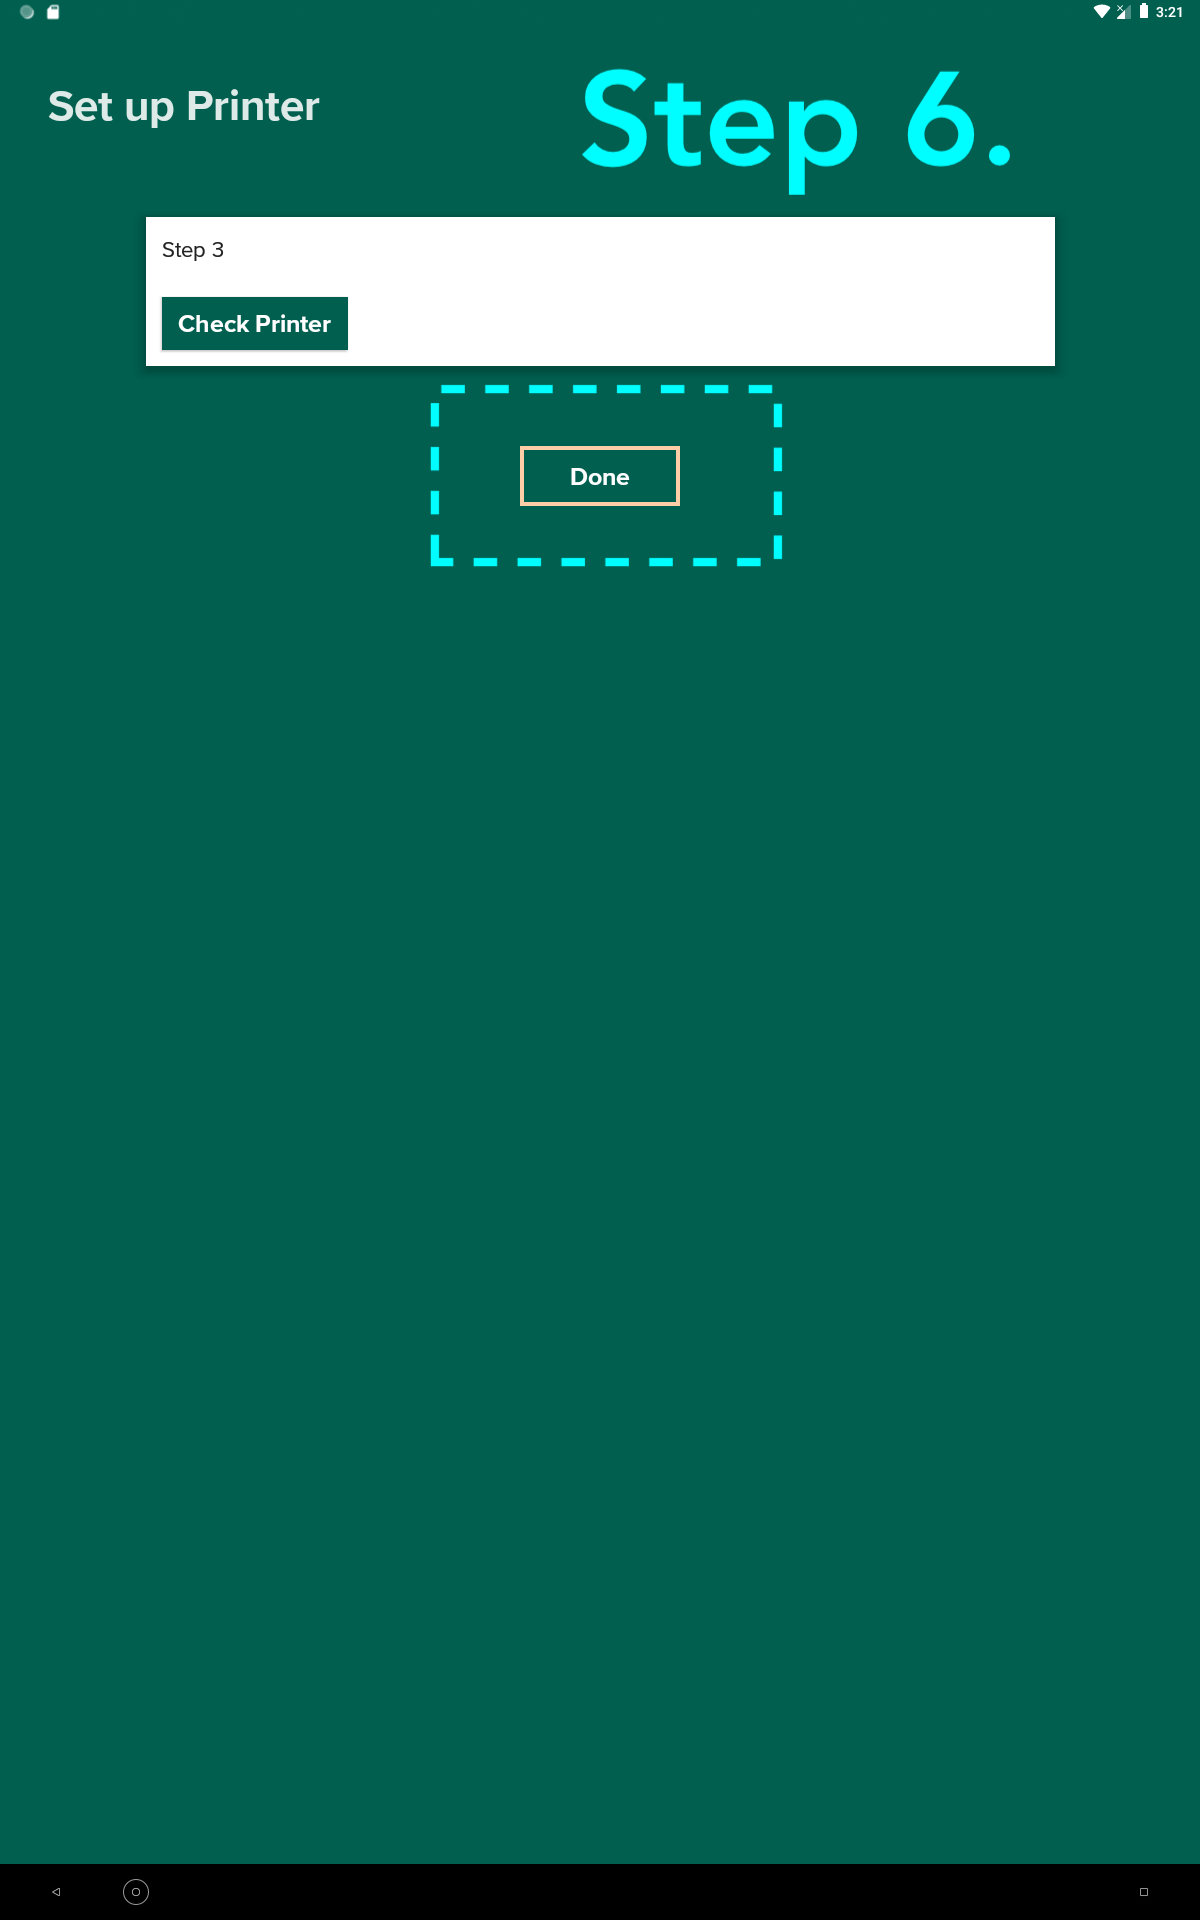
- Click “Done”.
IMPORTANT:
- Please select the correct printer model/type during the setting up process. We currently support Epson Tm-T20 and Tm-T88, Star TCP100, WikaWJF628C and Sanei.
- Usually if it’s not an Epson printer, select the “Sanei” option as default.
IMPORTANT:
- After selecting the printer, you should click "Check Printer" (if the printer is connected, it should print the receipt – Important!). Successful printer test will save the current printer in kiosk persistent settings.
- This setup should only be done once, when the printer is first configured for the kiosk, but could be done any time it is required afterwards.

 .
.  .
. 
CONFIGURING SOFT KEYBOARD
Configuring Soft Keyboard
Kiosks use Google Keyboard (Gboard) for capturing texts and numeric input. By default it may show “Suggestion strip” and have controls that could potentially allow users to get unauthorized access to Android System settings. That’s why it is good practice to disable all unnecessary controls on the keyboard.
How to disable keyboard “Suggestion Strip”
- Open the Android Settings app on the kiosk.
- Go to System => Language & input => Virtual keyboard
- Select Gboard
- On the left panel choose “Text correction”
- Disable toggle “Show suggestion strip”
Refreshing Menus
Log in to the Kiosk Admin Panel and follow the instructions below.
Important: Make sure the kiosk has access to the Internet.
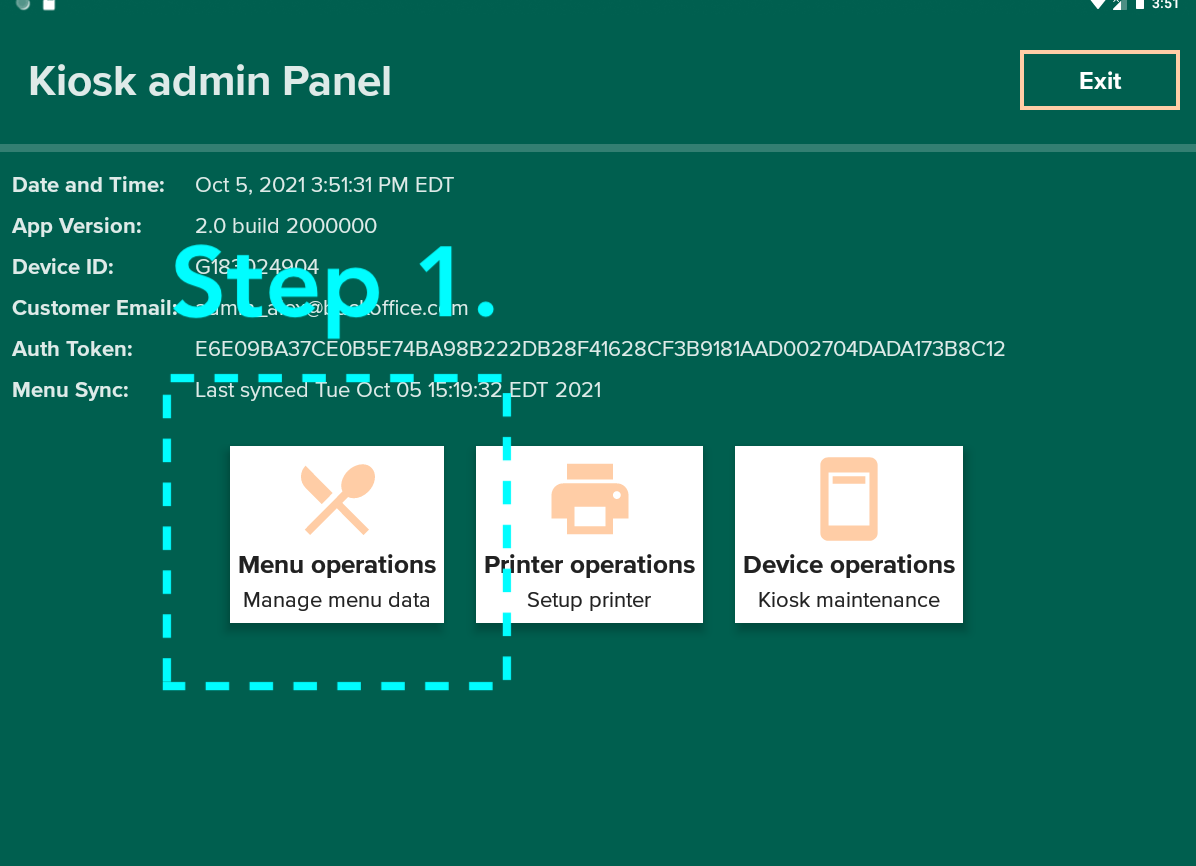
1. Tap on “Menu Operations” button
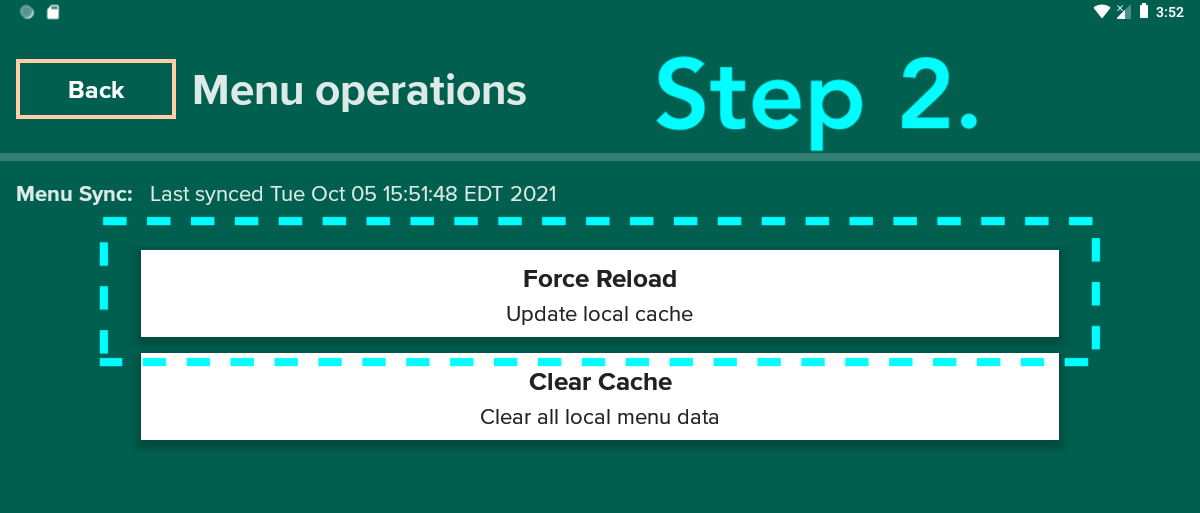
2. Tap on “Force Reload” button
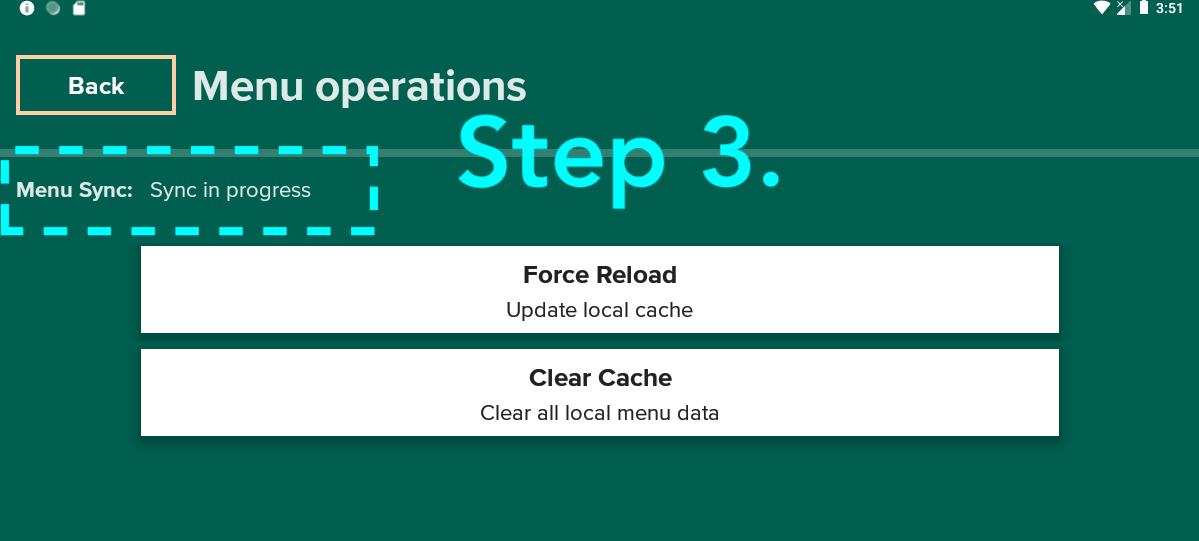
3. While the menu is refreshing, status will show “Sync in progress”.
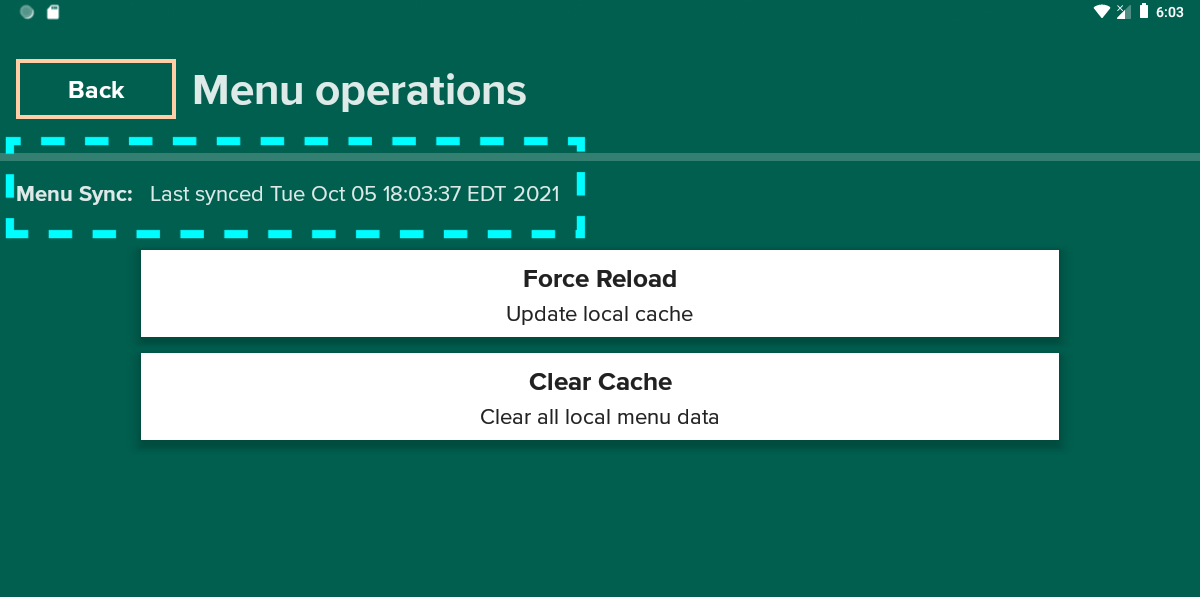
4. Status will update to “Last synced ...” after the operation is complete.
User Acceptance Testing
Before going live with the kiosk, it is important to place test orders to ensure orders are processed correctly.
When you place an order please pay attention to the following:
- Menus, items and modifiers are properly displayed on kiosk
- Payment is processed properly when placing orders
- Orders are sent to the proper KDS (if you are using a KDS)
- Scannable items are properly added to your cart (if you have scannable items)
- Receipts are printed upon placing order
Comments
0 comments
Please sign in to leave a comment.